OIDC provider setup
OpenID Connect (OIDC) is an authentication protocol that allows users to sign in using their existing accounts from providers like Google, Microsoft, or your corporate identity provider. It enables Single Sign-On (SSO) for seamless and secure authentication.
This guide walks you through configuring OIDC (OpenID Connect) providers for SSO authentication in the Unraid API using the WebGUI.
Quick start
Getting to OIDC Settings
- Navigate to your Unraid server's WebGUI.
- Go to Settings → Management Access → API → OIDC.
- You'll see tabs for different providers - click the + button to add a new provider.
OIDC providers interface overview
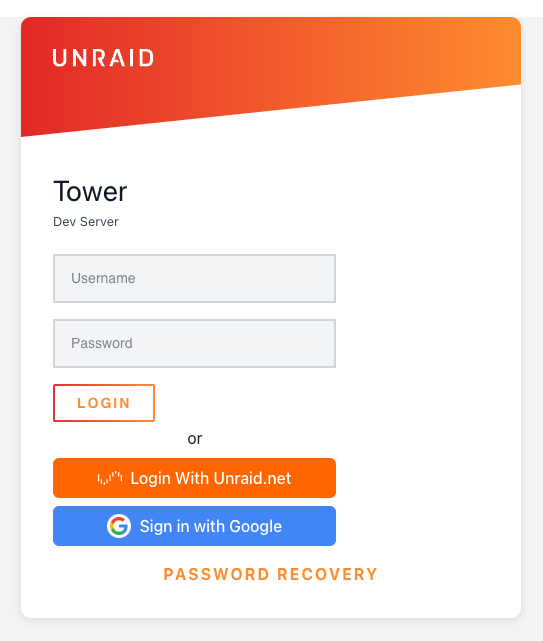 Login page showing traditional login form with SSO options - "Login With Unraid.net" and "Sign in with Google" buttons
The interface includes:
- Provider tabs: Each configured provider (Unraid.net, Google, etc.) appears as a tab.
- Add Provider button: Click the + button to add new providers.
- Authorization Mode dropdown: Toggle between "simple" and "advanced" modes.
- Simple Authorization section: Configure allowed email domains and specific addresses.
- Add Item buttons: Click to add multiple authorization rules.
Understanding authorization modes
The interface provides two authorization modes:
Simple mode (recommended)
Simple mode is the easiest way to configure authorization. You can:
- Allow specific email domains (e.g., @company.com).
- Allow specific email addresses.
- Configure who can access your Unraid server with minimal setup.
When to use Simple Mode:
- You want to allow all users from your company domain.
- You have a small list of specific users.
- You're new to OIDC configuration.
Advanced Mode
Advanced mode provides granular control using claim-based rules. You can:
-
Create complex authorization rules based on JWT claims.
-
Use operators like equals, contains, endsWith, startsWith.
-
Combine multiple conditions with OR/AND logic.
-
Choose whether ANY rule must pass (OR mode) or ALL rules must pass (AND mode).
When to use Advanced Mode:
-
You need to check group memberships.
-
You want to verify multiple claims (e.g., email domain AND verified status).
-
You have complex authorization requirements.
-
You need fine-grained control over how rules are evaluated.
Authorization rules
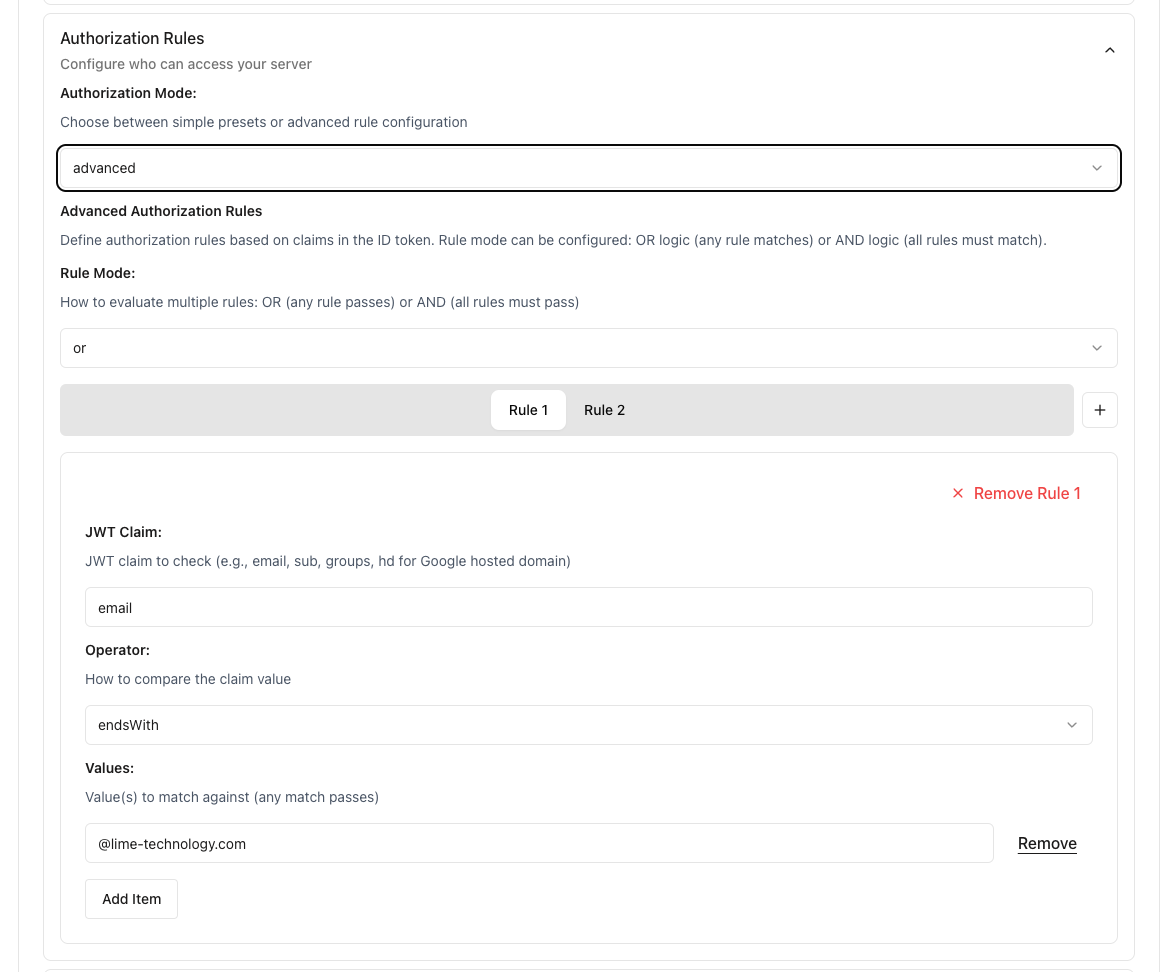 Advanced authorization rules showing JWT claim configuration with email endsWith operator for domain-based access control
Simple mode examples
Allow company domain
In simple authorization:
- Allowed Email Domains: Enter
company.com. - This allows anyone with @company.com email.
Allow specific users
- Specific Email Addresses: Add individual emails.
- Click Add Item to add multiple addresses.
Advanced Mode Examples
Authorization Rule Mode
When using multiple rules, you can choose how they're evaluated:
-
OR Mode (default): User is authorized if ANY rule passes.
-
AND Mode: User is authorized only if ALL rules pass.
Email Domain with Verification (AND Mode)
To require both email domain AND verification:
- Set Authorization Rule Mode to
AND. - Add two rules:
- Rule 1:
- Claim:
email - Operator:
endsWith - Value:
@company.com
- Claim:
- Rule 2:
- Claim:
email_verified - Operator:
equals - Value:
true
- Claim:
- Rule 1:
This ensures users must have both a company email AND a verified email address.
Group-Based Access (OR Mode)
To allow access to multiple groups:
- Set Authorization Rule Mode to
OR(default). - Add rules for each group:
- Claim:
groups - Operator:
contains - Value:
adminsOr add another rule: - Claim:
groups - Operator:
contains - Value:
developers
- Claim:
Users in either admins OR developers group will be authorized.
Multiple Domains
- Claim:
email
- Operator:
endsWith
- Values: Add multiple domains (e.g.,
company.com,subsidiary.com)
Complex Authorization (AND Mode)
For strict security requiring multiple conditions:
- Set Authorization Rule Mode to
AND. - Add multiple rules that ALL must pass:
- Email must be from company domain
- Email must be verified
- User must be in specific group
- Account must have 2FA enabled (if claim available)
Configuration Interface Details
Provider Tabs
-
Each configured provider appears as a tab at the top.
-
Click a tab to switch between provider configurations.
-
The + button on the right adds a new provider.
Authorization Mode Dropdown
-
Simple: Best for email-based authorization (recommended for most users).
-
Advanced: For complex claim-based rules using JWT claims.
Simple Authorization Fields
When "simple" mode is selected, you'll see:
- Allowed Email Domains: Enter domains without @ (e.g.,
company.com).- Helper text: "Users with emails ending in these domains can login"
- Specific Email Addresses: Add individual email addresses.
- Helper text: "Only these exact email addresses can login"
- Add Item buttons to add multiple entries.
Advanced Authorization Fields
When "advanced" mode is selected, you'll see:
- Authorization Rule Mode: Choose
OR(any rule passes) orAND(all rules must pass).
- Authorization Rules: Add multiple claim-based rules.
- For each rule:
- Claim: The JWT claim to check.
- Operator: How to compare (equals, contains, endsWith, startsWith).
- Value: What to match against.
Additional Interface Elements
- Allowed Email Domains: Enter domains without @ (e.g.,
-
Enable Developer Sandbox: Toggle to enable GraphQL sandbox at
/graphql. -
The interface uses a dark theme for better visibility.
-
Field validation indicators help ensure correct configuration.
Required redirect URI
All providers must be configured with this exact redirect URI format.
http://YOUR_UNRAID_IP/graphql/api/auth/oidc/callback
Replace YOUR_UNRAID_IP with your actual server IP address (e.g., 192.168.1.100 or tower.local).
Issuer URL format
The Issuer URL field accepts both formats, but base URL is strongly recommended for security:
- Base URL (recommended):
https://accounts.google.com - Full discovery URL:
https://accounts.google.com/.well-known/openid-configuration
Security Note: Always use the base URL format when possible. The system automatically appends /.well-known/openid-configuration for OIDC discovery. Using the full discovery URL directly disables important issuer validation checks and is not recommended by the OpenID Connect specification.
Examples of correct base URLs:
- Google:
https://accounts.google.com - Microsoft/Azure:
https://login.microsoftonline.com/YOUR_TENANT_ID/v2.0 - Keycloak:
https://keycloak.example.com/realms/YOUR_REALM - Authelia:
https://auth.yourdomain.com
Testing your configuration
Unraid login page displaying both traditional username/password authentication and SSO options with customized provider buttons
- Save your provider configuration.
- Log out (if logged in).
- Navigate to the login page.
- Your configured provider button should appear.
- Click to test the login flow.
Troubleshooting
Common issues
"Provider not found" error: Ensure the issuer URL is correct and that the provider supports OIDC discovery (/.well-known/openid-configuration).
"Authorization failed": In simple mode, check email domains are entered correctly (without @). In advanced mode, verify claim names match exactly what your provider sends, check if Authorization Rule Mode is set correctly (OR vs AND), and ensure all required claims are present in the token. Enable debug logging to see actual claims and rule evaluation.
"Invalid redirect URI": Ensure the redirect URI in your provider matches exactly, include the correct port if using a non-standard configuration, and verify the redirect URI protocol matches your server's configuration (HTTP or HTTPS).
Cannot see login button: Check that at least one authorization rule is configured and verify the provider is enabled/saved.
Debug mode
To troubleshoot issues:
- Enable debug logging:
LOG_LEVEL=debug unraid-api start --debug
- Check logs for:
- Received claims from provider.
- Authorization rule evaluation.
- Token validation errors.
Use Simple Mode for authorization to prevent overly accepting configurations and reduce misconfiguration risks. Be specific with authorization rules and avoid overly broad rules. Rotate secrets regularly by updating client secrets periodically. Test thoroughly to verify only intended users can access.
If you encounter issues, check your provider's OIDC documentation, review Unraid API logs for detailed error messages, ensure your provider supports standard OIDC discovery, and verify network connectivity between Unraid and provider. For additional help, visit the Unraid forums.
Provider-specific setup
Unraid.net provider
The Unraid.net provider is built-in and pre-configured. You only need to configure authorization rules in the interface.
Configuration:
- Issuer URL: Pre-configured (built-in provider)
- Client ID/Secret: Pre-configured (built-in provider)
- Redirect URI:
http://YOUR_UNRAID_IP/graphql/api/auth/oidc/callback
Configure authorization rules using simple mode (allowed email domains/addresses) or advanced mode for complex requirements.
Google
Setup Steps
Set up OAuth 2.0 credentials in Google Cloud Console:
- Go to APIs & Services → Credentials.
- Click Create Credentials → OAuth client ID.
- Choose Web application as the application type.
- Add your redirect URI to Authorized redirect URIs.
- Configure the OAuth consent screen if prompted.
Configuration:
- Issuer URL:
https://accounts.google.com - Client ID/Secret: From your OAuth 2.0 client credentials
- Required Scopes:
openid,profile,email - Redirect URI:
http://YOUR_UNRAID_IP/graphql/api/auth/oidc/callback
Google requires valid domain names for OAuth redirect URIs. Local IP addresses and .local domains are not accepted. To use Google OAuth with your Unraid server, you'll need:
- Option 1: Reverse Proxy - Set up a reverse proxy (like NGINX Proxy Manager or Traefik) with a valid domain name pointing to your Unraid API.
- Option 2: Tailscale - Use Tailscale to get a valid
*.ts.netdomain that Google will accept. For more information about Tailscale, see Remote access. - Option 3: Dynamic DNS - Use a DDNS service to get a public domain name for your server.
Remember to update your redirect URI in both Google Cloud Console and your Unraid OIDC configuration to use the valid domain.
For Google Workspace domains, use advanced mode with the hd claim to restrict access to your organization's domain.
Authelia
Configure OIDC client in your Authelia configuration.yml with client ID unraid-api and generate a hashed secret using the Authelia hash-password command.
Configuration:
- Issuer URL:
https://auth.yourdomain.com - Client ID:
unraid-api(or as configured in Authelia) - Client Secret: Your unhashed secret
- Required Scopes:
openid,profile,email,groups - Redirect URI:
http://YOUR_UNRAID_IP/graphql/api/auth/oidc/callback
Use advanced mode with groups claim for group-based authorization.
Microsoft/Azure AD
Register a new app in Azure Portal under Azure Active Directory → App registrations. Note the Application ID, create a client secret, and note your tenant ID.
Configuration:
- Issuer URL:
https://login.microsoftonline.com/YOUR_TENANT_ID/v2.0 - Client ID: Your Application (client) ID
- Client Secret: Generated client secret
- Required Scopes:
openid,profile,email - Redirect URI:
http://YOUR_UNRAID_IP/graphql/api/auth/oidc/callback
Authorization rules can be configured in the interface using email domains or advanced claims.
Keycloak
Create a new confidential client in Keycloak Admin Console with openid-connect protocol and copy the client secret from the Credentials tab.
Configuration:
- Issuer URL:
https://keycloak.example.com/realms/YOUR_REALM - Client ID:
unraid-api(or as configured in Keycloak) - Client Secret: From Keycloak Credentials tab
- Required Scopes:
openid,profile,email - Redirect URI:
http://YOUR_UNRAID_IP/graphql/api/auth/oidc/callback
For role-based authorization, use Advanced Mode with realm_access.roles or resource_access claims.
Authentik
Create a new OAuth2/OpenID Provider in Authentik, then create an Application and link it to the provider.
Configuration:
- Issuer URL:
https://authentik.example.com/application/o/<application_slug>/ - Client ID: From Authentik provider configuration
- Client Secret: From Authentik provider configuration
- Required Scopes:
openid,profile,email - Redirect URI:
http://YOUR_UNRAID_IP/graphql/api/auth/oidc/callback
Authorization rules can be configured in the interface.
Okta
Create a new OIDC Web Application in Okta Admin Console and assign appropriate users or groups.
Configuration:
- Issuer URL:
https://YOUR_DOMAIN.okta.com - Client ID: From Okta application configuration
- Client Secret: From Okta application configuration
- Required Scopes:
openid,profile,email - Redirect URI:
http://YOUR_UNRAID_IP/graphql/api/auth/oidc/callback
Authorization rules can be configured in the interface using email domains or advanced claims.